
The other day I came across a social media post that was about utilizing Burp Suite to identify vulnerabilities in web applications. I had heard of Burp before but never really had the chance to play around with it – until now.
Just like a lot of other security tools, Burp has a community version along with its commercial product. I decided to download the free edition from here in my home lab. The installation process is straightforward and in no time you have Burp up and running. Here is how the initial interface looks like:

Right when I finished my installation of Burp, I realized that I did not have a web application running in my lab that I could use to test Burp against. Bummer! Now I had to decide between setting up a web server myself or finding a commercial distribution that came pre-built with one. This was a no-brainer – and within minutes I found a few distributions that were designed for testing and learning web application security; such as SamuraiWTF, WebGoat and Kali Web Application Metapackages. I decided to go with SamuraiWTF.
SamuraiWTF gives you the option to run from a live disk or install it in a VM. I decided to install the VM. Here is a good guide to the installation process. I give my VM instance 4GB RAM and 3 cores; more than enough horsepower.
This distribution comes pre-installed with Mutillidae, which is a “free, open source, deliberately vulnerable web-application providing a target for web-security enthusiasts”. This was perfect for what I was looking for. Setting up the Mutillidae in pretty simple – all I had to do was change my network configurations to NAT and that was it. However, if you need more information on configuration here are some great video guides on Mutillidae; in fact, I used some of these myself while configuring Burp to work with Mutilliade.
After finishing all of the above prep work, I was ready to run Burp!
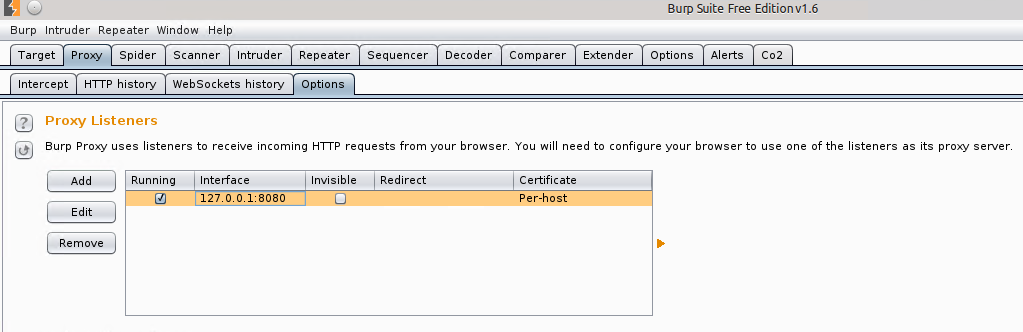
For those who are not familiar with Burp, it’s an interception proxy which sits between your browser and the web server and by doing so it is able to intercept requests/responses and provides you the ability to manipulate the content. To do so you have to configure Burp as your proxy. On your VM, this would be your localhost (Proxy Tab > Options):
Likewise, you would have to configure your browser to that same proxy. Here is my proxy configuration on Firefox:

Now as you navigate through your Mutilliadae webpage, all your requests should go through Burp. One thing you have to do is turn on the Intercept option in Burp. It’s under Proxy > Intercept.
What this allows you to do is see the request as its made but gives you the control to either forward it to the web server or simply drop the request (like a typical MiTM). For example, on the login page of Mutilliade i used admin name and admin123 password. And as soon as I hit “Login” I saw the request being made from my browser to the web server in Burp:

In the screenshot above, you can see the two options: Forward and Drop. If you hit forward, the web server will receive this request from your browser and will respond as it would normally. In this case, the account I used to log in did not exist:

Burp has the capability to also capture the responses. It is an option that you can turn on by going to Proxy > Options and towards the middle of the page you will see “Intercept Server Responses”. By turning this on you will be able to see and control both sides of the requests:

If you look at Target > Site Map; on the left pane you will see a list of all the sites that you have visited with the Burp proxy on:
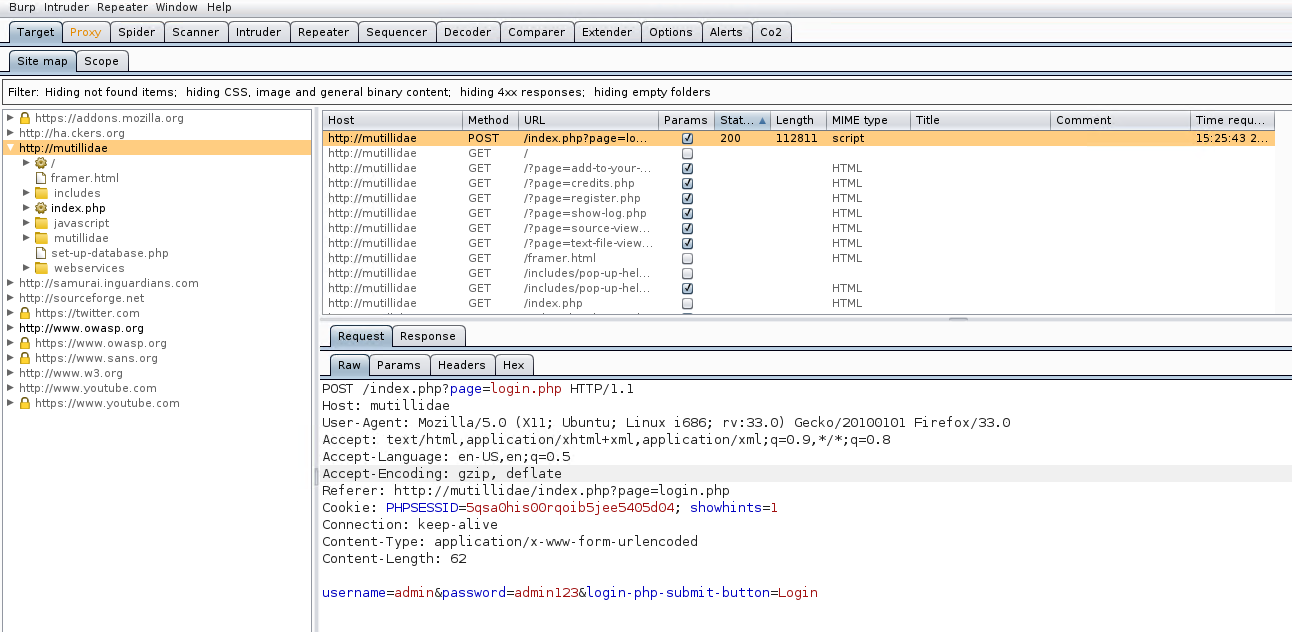
One advantage of the above feature is that it allows you to go back and revisit requests and responses. The sites that are in grey color are those that are available on the target web page but you have not visited them.
Another neat feature is that if you do not want to visit each page individually you can run the “Spider” feature which will map the whole target page for you.

If you go under Spider > Control you are able to see the status of the Spider as it runs:

When you intercept request or response, you have the ability to send that to other features of Burp. You are able to view these additional options by right-clicking on the intercept:

Towards the bottom of the official Burp Suite guide page here you can see a brief description of most of the options shown in the screenshot above. The one I found really neat is the “Repeater” option which allows you to modify and re-transmit requests repeatedly without having the need to perform new intercepts each time.
This concludes my brief journey of getting started with Burp using SamuraiWTF. There is a whole lot more than I had the chance to explore but here is a great reference for advanced topics.
Below is a quick blurb on some of Burps features:
Spider: crawls the target and saves the numerous web pages that are on the target.
Intruder: automated attack feature which tries to automagically determine which parameters can be targeted i.e. fuzzing.
Fuzzing options: Sniper (fuzz each position one-by-one), Battering Ram (all positions on the target receive one payload), Pitchfork (each target position is fuzzed in parallel) Cluster Bomb (repeats through payloads for multiple positions at once).
Proxy: used to capture requests & responses to either just monitor or manipulate and replay.
Scope: controls what (pages, sites) is in/out of the test “scope”.
Repeater: manually resubmit requests/responses; allows modification.
Sequencer: used to detect predictability of session tokens using various built-in tests i.e. FIPS 140-2.
Decoder: allows encoding/decoding of the target data i.e. BASE64, Hex, Gzip, ASCII, etc.
Comparer: allows side-by-side analysis between two requests/responses.
Cheers!
