
Unfortunately, after my last CDR post – for some unrelated reason, I had my main lab system crash and now I have to rebuild most of the different lab machines that I had before. Obviously, this is a little frustrating because I had everything set up the way I wanted it and now I have to pretty much start from scratch. But to make this rebuilding process more pleasant and productive, I think I am going to document and share some of the labs that I am going to build. Most of these are going to be pretty simple to set up without much difficulty using VMware Workstation. I am not going to go over setting up VMware Workstation since there are already a ton of YouTube videos on it.
First, we are going to select the platform that we are going to use for most of these machines – our choice: Ubuntu 13 Desktop.
The first tool that we are going to install is the Nessus vulnerability scanner. In the first CDR project, we used Nessus as one of our reconnaissances tools along with Nmap. However, this tool can be used in just your lab or home network for identifying vulnerabilities in your systems.
We are going to be installing the latest version of Nessus v6 Home – as of this post. For the operating system, we will choose Ubuntu 11.10, 12.04, 12.10, 13.04, 13.10, and 14.04 AMD64 and download the .deb package.
Here are the sequence of commands after you have downloaded the package and opened the appropriate download directory in the terminal.
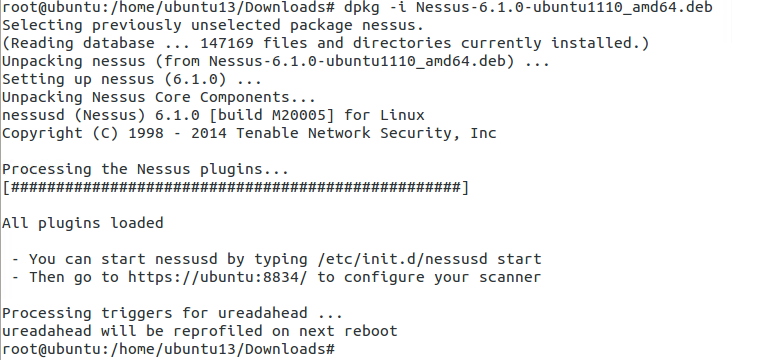 We are pretty much done. The only thing you need to check is if the Nessus service is running. Usually, it starts automatically but you can verify by running: service nessusd status. If the output shows stopped then simply run the following to start it: service nessusd start.
After above, open your browser and type your IP and port 8834. You can find your IP address by running ifconfig in your terminal. My IP address on this machine is 192.168.244.178.

You should get a similar page as above. Follow through the prompt and in a couple of screens you will have the option to create an initial account for your Nessus scanner. After that, you will need to provide Plugin Feed Registration. For home use, you can request the activation code by completing the following: http://www.tenable.com/products/nessus-home
After completing all the steps thus far – you are done with installing your Nessus scanner. Now you need to configure your scans. Following are the basic steps to configure a scan:
New Scan > Basic Network Scan > [Complete General Page with the Name of the Scan and the target IPs]. On the left side, you have additional scan options that you can play around with. After you are done with making your selections, simply hit save and your scan will automatically start. The scan duration depends on the number of IPs that you are scanning and if they are credentialed or non-credentialed.
After your scan completes you will be able to see the scan results and drill down on each host to see the details on the findings. Later you can also run just reports against previously completed scans.
This is pretty much all you need to do for the basic setup. Feel free to run more scans and try to run a credentialed scan as they will provide the most comprehensive vulnerability information and its also least intrusive on your target systems.
Until next time!
