
The goal of this post is to provide an overview of an awesome OWASP project which is designed to find vulnerabilities in web applications called: Zed Attack Proxy (ZAP). I have known about ZAP for a while but I just thought I do a quick write up.
ZAP was selected as the second top security tool of 2014 by ToolsWatch.org. The project is extremely well documented with a user guide, FAQs, tutorials, etc., all conveniently located on its wiki. Also, since there is already so much professional documentation available for this project, this post will not pay too much attention to its features and functionality, but rather on my experience with the tool and how I got it up and running.
ZAP can run on Windows, Linux, and OS/X, and it can be downloaded from here. I downloaded ZAP on my Ubuntu 13 Desktop instance. Note that Java version 7 is required for both Windows and Linux. Also, ZAP comes included in several security distributions — a list can be found here.
After you have extracted the ZAP_2.3.1_Linux.tar.gz, you just need to run the zap.sh:

Soon after that, the application will auto-start. You may be prompted to generate an SSL certificate — which you will need in order to test secure applications — however, I skipped that initially since you can always come back to it.
The last step in the installation process is similar to BURP and that is to configure your browser to use ZAP as a proxy. The ZAP team has a nice guide here on how to do this for the most common browsers. I set Firefox with ZAP proxy:

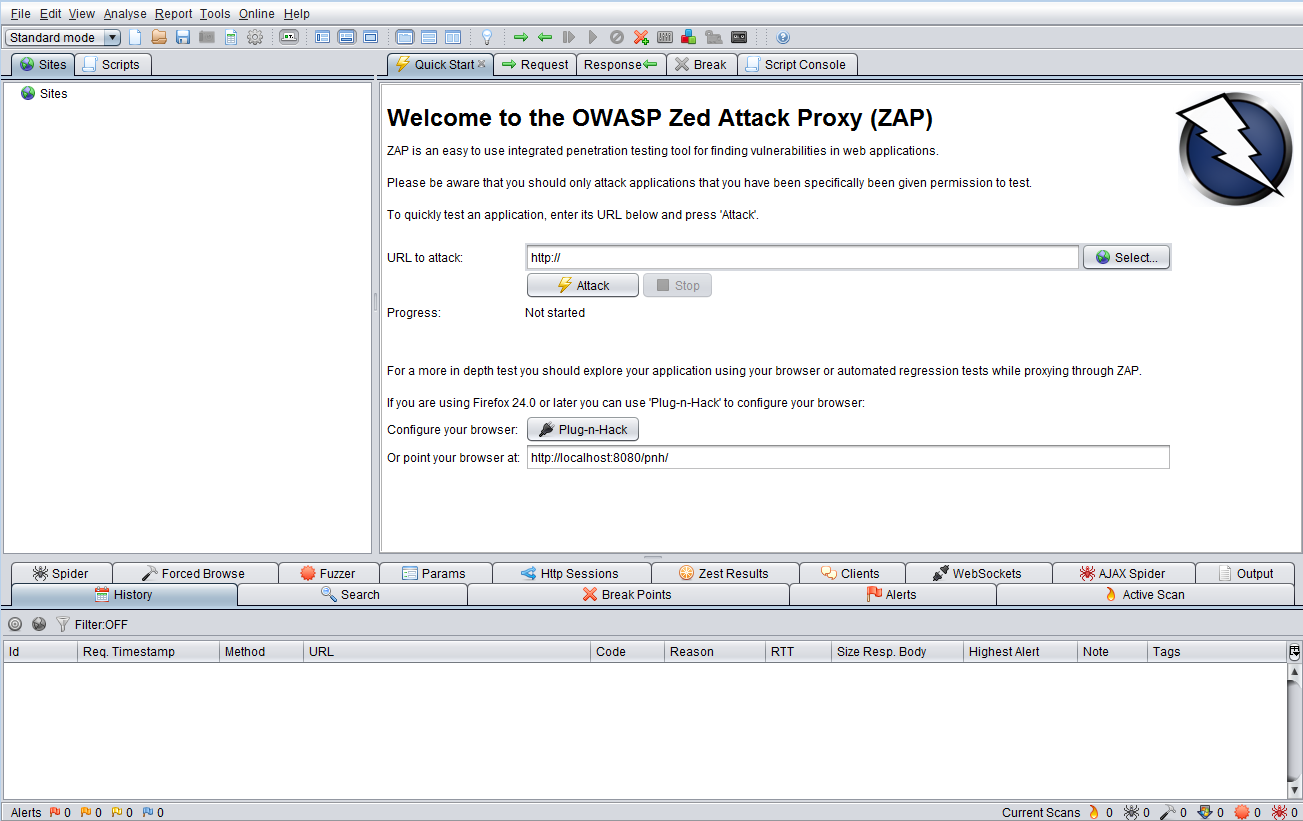
After completing the step above, you are done with the installation process and are ready to kick off a scan. Here is how the home page should look like.
The first thing I would like to call your attention to before setting up a scan is to please make sure you have explicit permission before you scan any site. It is best to deploy a dummy web application on your local machine and use that to scan and learn.
If you have questions about where to start in ZAP, the perfect place to start would be the awesome user guide that comes with the installation. It can be accessed from Help > OWASP ZAP User Guide:

I believe everything that is found on ZAP’s online wiki can be located in this user guide, if not more. I think that is great because as you look through the home page and menu options, it can be a bit overwhelming. But you can find answers to what all of the buttons do from the user guide as well as from here and here.
Going back to the homepage, you will see the following option:
![]()
This is probably the best place to start off with your first scan. Alternatively, you could visit your demo site using the browser on which you configured ZAP proxy, and as you navigate through the site, ZAP will begin to populate the structure on the left home-page panel:
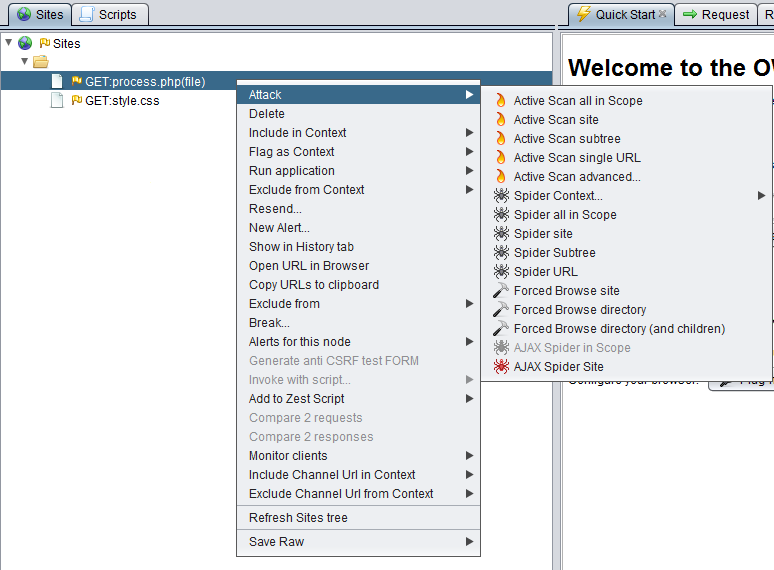
 After you have the site structure similar to the above, you can take your test in several different directions — most of which can be viewed by simply right-clicking on any of the site’s pages:
If you are fairly new to web application security (like I am) chances are that whichever direction you choose to take, you will have questions. Fortunately, there are YouTube videos that you can refer to here. One video in particular that you should check out is this as it can come in handy when you want ZAP to auto-authenticate to your site’s login fields.
This concludes the introduction of a feature-packed tool from a long list of tools that I plan to explore. This already looks to be the best of the bunch. Even if you just heard of web application security, and you are looking to try one, this is a must-have for you; and it’s free! I am really glad that I got the chance to play with this tool and now it is part of my toolkit. I recommend that you check it out to begin rockin’ on your Web Application Security game!
Follow me on Twitter: @azeemnow


 Wireshark Protocol Hierarchy ]


 Based on the above, it seems like the traffic generated on port 9001 (default TOR port) are simply connection synchronization attempts followed by erupt connection resets.